Generate design tokens, export graphics, and extract design token-driven React components from your Figma documents. Originally inspired by Salesforce Theo.
Figmagic promotes a structured way of assembling design systems. Following the primary principle of atomic design, Figmagic wants you to build from the bottom up, beginning with decomposing the tokens. Tokens shape elements, which form components, that are ordered in compositions, which get presented in views… You know the drill, though I am switching Brad Frost’s nomenclature into something more front-end friendly.
When it comes to code generation, Figmagic tries to do this in a better way. Instead of over-eagerly promoting hardcoded code generation from huge and complex components, Figmagic tries to competently, or at least “mostly-right”, handle automation for things that should not be too context-dependent or manual input-heavy. Code should also be as close to “normal” as possible—meaning that generated code binds values to tokens and not some random px values as other platforms do. All of this can happen because Figmagic assumes a way of working that respects standard CSS and HTML: no magic trickery! Figmagic avoids some of the cognitive and technical overhead by introducing a concept called Elements, which are Figmagic-compliant components that can be output into code. By composing larger components out of simple Elements, code generation is made much more manageable while also promoting much more structured design.
Figmagic does not aim at completely removing designers or developers: It just aims to move them closer, while eliminating any of the tedious busywork that has grown around front-end development.
Please note: Figmagic requires that your document structure is identical to what I show in the template at https://www.figma.com/community/file/821094451476848226/Figmagic-%E2%80%94-Design-System-for-Tokens.
Figmagic is compiled from Typescript to ES6, so you should have Node 10 or later for it to work on your machine.
Example project
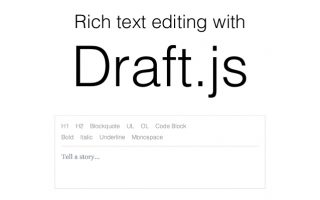
An example project—using React, Styled Components and Storybook—is available at https://github.com/mikaelvesavuori/figmagic-example.
Note that this demo is not meant to fully style and do all of the things in the Figma document. I wanted to straddle a middle-of-the-road solution where I did the least work possible to get it working with React and style only a few of the most obvious and helpful elements, like setting disabled state on the button and checkbox.

Figmagic Example Demo: On the left is a big Figma component assembled of a number of “Elements”, Figmagic-compliant components that can be output into code. On the right is the React-composed version of those after just a few minutes of coding and closing elements correctly.
Using Figmagic
Installation
Global (recommended)
Run npm install -g figmagic or yarn global add figmagic.
Local
Local usage is possible by installing Figmagic as a developer dependency (under devDependencies) with npm install figmagic -D or yarn add figmagic -D, then using a script pointing to the local version, like so:
"scripts": {
  "figmagic": "node ./node_modules/figmagic/build/index.js"
}
Create configuration file (.figmagicrc)
Run figmagic init to initialize a basic .figmagicrc file. As long as you provide your Figma token and document ID/URL, the new generated file is ready to use for Element Sync which can only be done if your configuration points to valid code generation templates (which the generated one does). You’ll see that the config will point templates.templatePath{Graphic|React|Styled|Storybook} to ./node_modules/figmagic/templates/{graphic|react|styled|story}. Read more under the Configuration file section.
Running Figmagic
First of all, get your Figma API token and Figma URL:
- Get your file ID by right-clicking your Figma tab inside of the app and click
Copy Link—the first, long junk-looking bit is the ID. - For more on API keys, go to Figma’s developer docs.
Pass in your Figma API token and Figma URL by either:
- Stepping into your project directory (where you want Figmagic to run), and add or replace FIGMA_URL and FIGMA_TOKEN in a
.envfile with your own file ID and API token key. - Passing in API token and URL through the CLI, like this
figmagic --token {TOKEN} --url {URL}(substitute curly braces for your actual values) - Setting them in
.figmagicrcundertokenandurl. This is discouraged since you will display these values in clear text and you probably don’t want that.
Then:
- Run
figmagic - You should now have a folder with the raw JSON dump (default:
/.figmagic) and a folder with tokens (default:/tokens) in the root
Overwritten files are moved to trash
When running figmagic, files will be moved with the Node module trash (multi-platform) into your OS’s trash can. Thus, you can recover anything unintentionally overwritten.
Folders
Folder names below follow their default naming. The naming is possible to change via configuration.
.figmagicwill contain the extracted JSON retrieved from Figma’s APItokenswill contain the token fileselementswill contain the generated codegraphicswill contain graphics
What are Design Tokens?
Design tokens are the abstract but shared elements from which your design system is built.
Design tokens express any of the individual values that you build from, such as colors, spacing, and typographic features.
Tokens offer a form of “contract” between a designer’s intent and its fulfillment by developers. This means that both sides agree to avoid by all means anything that’s not codified also as a token. For example, avoiding spacing values that are not also available as a token. It’s similar in many ways to old-school styleguides, but tokens should only ever communicate strict, hard values. Styleguides can tend to be context-sensitive and full of explanation—tokens must communicate without context or explanation.
However: You may still want to add written guidance for usage. It’s just that the tokens should be able to be consumed without understanding anything specific about them.
You should bind tokens to Figma styles whenever and wherever possible to simplify your own design work, but make sure that those are also represented in the Tokens page, as this page is where a developer will pick up tokens with Figmagic.
The types of design tokens Figmagic can extract
You can currently extract design tokens for:
- Colors
- Font Sizes
- Spacing
- Font Weights
- Line Heights
- Font Families
- Letter Spacings
- Z Indices
- Radii
- Border Widths
- Shadows (currently supports single/multiple Drop Shadows)
- Opacities
- Durations (for animations)
- Delays (for animations)
- Easing functions (for animations)
- Media Queries
A typical use-case for the generated documents is to feed the extracted values into CSS systems that support external values (such as Styled Components, Emotion, Styled System, any other CSS-in-JS libraries, or maybe even Sass).